GameInput / XInput SDK
This guide provides step-by-step instructions for setting up custom haptic effects for an GameInput/XInput controller using the Interhaptics Unreal SDK.
To get started, simply repeat the first four steps outlined in the Getting Started chapter. Then, follow these instructions for a no-frills, no-code implementation:
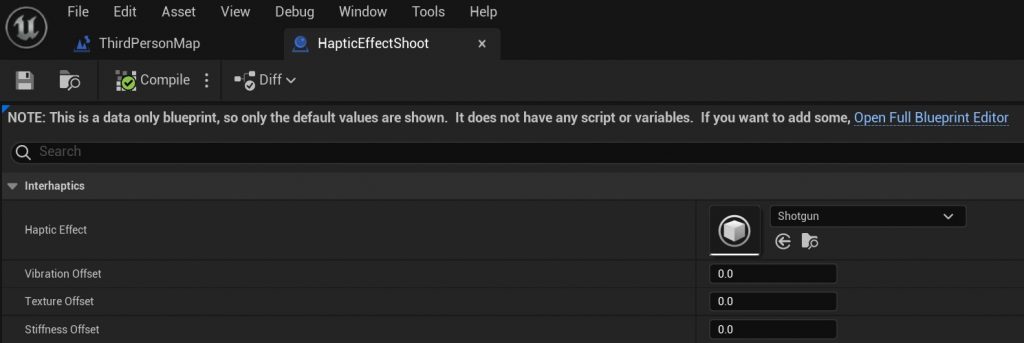
Step 1: Add the Haptic Source blueprint
Create a new Blueprint of the HapticSource type (HapticEffectShoot in this example) and add it to the Viewport. Assign a haptic effect from the library or create your own using Haptic Composer.
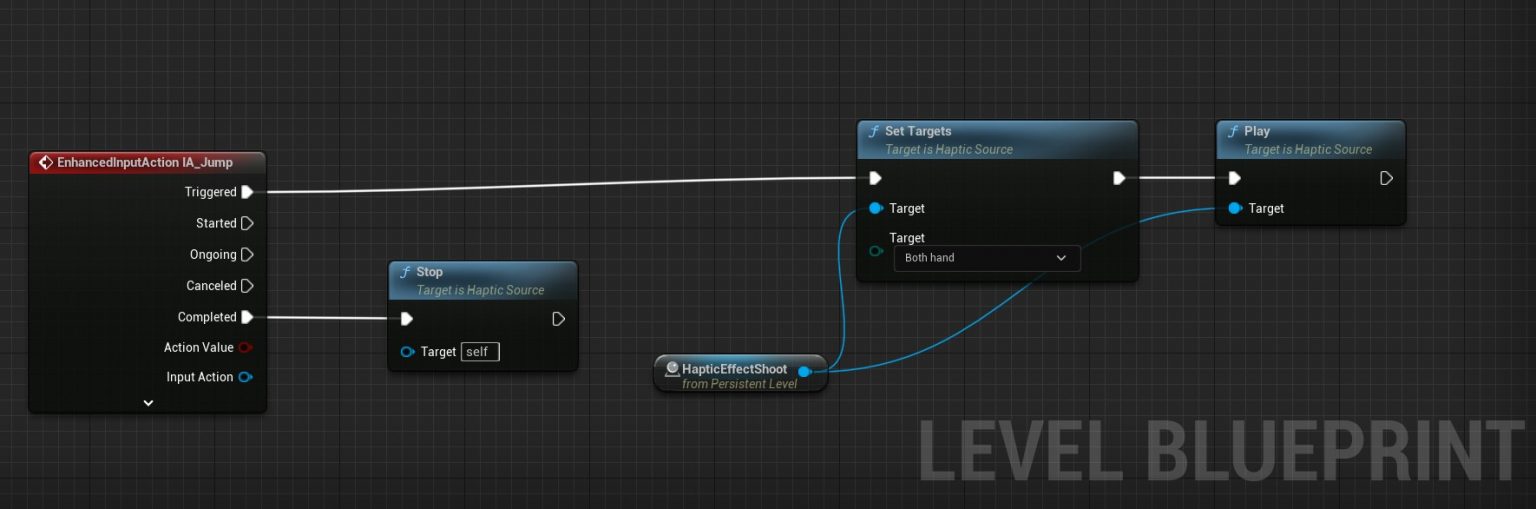
Step 2: Modify the Level Blueprint
Open the Level Blueprint and drag the HapticEffectShoot Actor from the Viewport to the Event Graph. Add a Gamepad Event to the HapticEffectShoot Blueprint. In this example, we use the Gamepad Face Button Top (Y button) as the input for the event.
In the Pressed state, stop all present Haptic Sources from playing (a good practice for clear haptic effects). Set the Target on "Both hands" to play on both sides of the controller and execute Play.
In the Released state, you may stop the Haptic Source if desired (optional).
You can view the resulting blueprint in the image below.

If you prefer to use Enhanced Input, you can replace the Gamepad Event with an Enhanced Input action. The example below shows the same haptic effect implementation on the Jump action with the A(XBox controller) button binding.