Razer Sensa HD Haptics Wwise Plugin
Table of Contents
Introduction
Bridge the gap between audio-driven motion and next-generation haptic feedback. The Razer Sensa HD Haptics plugin for Wwise extends the Wwise Motion framework to deliver high-fidelity haptic output directly to Razer Sensa HD-compatible devices. By mapping Wwise Motion buses and signals to Razer's haptic rendering engine, sound designers and game developers can author, preview, and ship precise tactile experiences without leaving their existing Wwise workflow.
The plugin is published by WYVRN and surfaces in Wwise as an audio-device sink under Devices → Factory Motion.
This guide covers the current release with the following targets:
- Platform: Windows x64
- Wwise Version: 2025.1.6+ for HD Haptics; 2025.1.5 supports Rumble only
- Mandatory plug-ins: Motion (Audiokinetic) + Razer Sensa HD Haptics (zip archive)
Installation
-
Download the plugin from WYVRN. Unzip the archive locally and keep the full Package folder intact.
Note: If a previous Motion Sensa build is already listed under the Launcher's Plug-ins tab, click its gear icon, choose Uninstall, and confirm with Yes before continuing. Skipping this can cause version conflicts.
-
Follow the Audiokinetic documentation to install the plugin.
- Start the Audiokinetic Launcher.
- Open the Wwise tab and locate the target install (e.g.
2025.1.6).
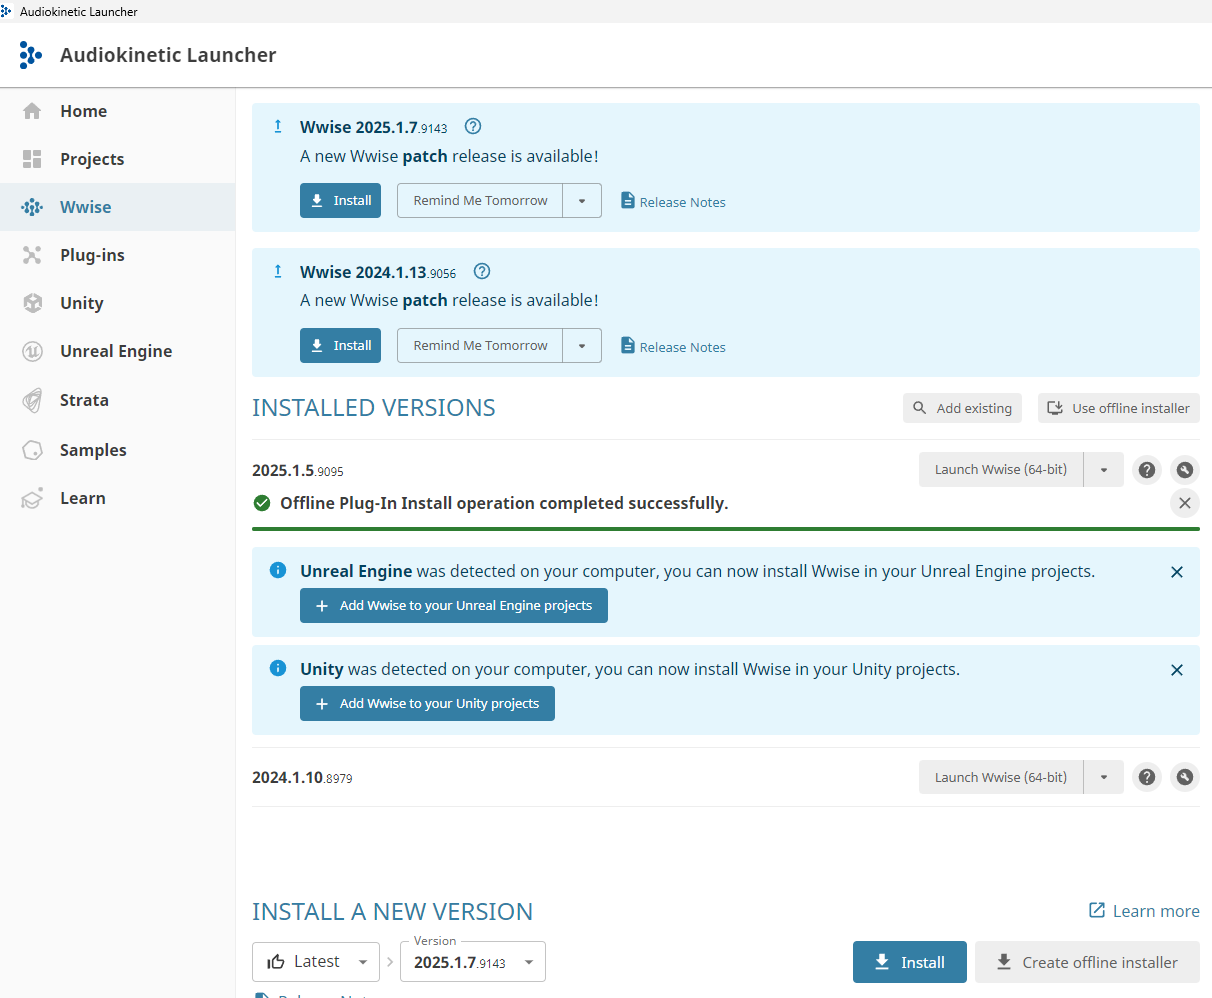
Audiokinetic Launcher — Wwise tab with installed versions -
Open the Plug-ins tab, click Add from directory, and select the unzipped Package folder. Ensure Razer Sensa HD Haptics Plugin is checked, pick the matching Version (e.g.
2025.1.0.0), and press Modify.
Razer Sensa HD Haptics plugin entry in the Launcher -
After the install completes, the Launcher's INSTALLED PLUG-INS list should show both Motion (Audiokinetic) and Razer Sensa HD Haptics (WYVRN) at the matching Wwise build.
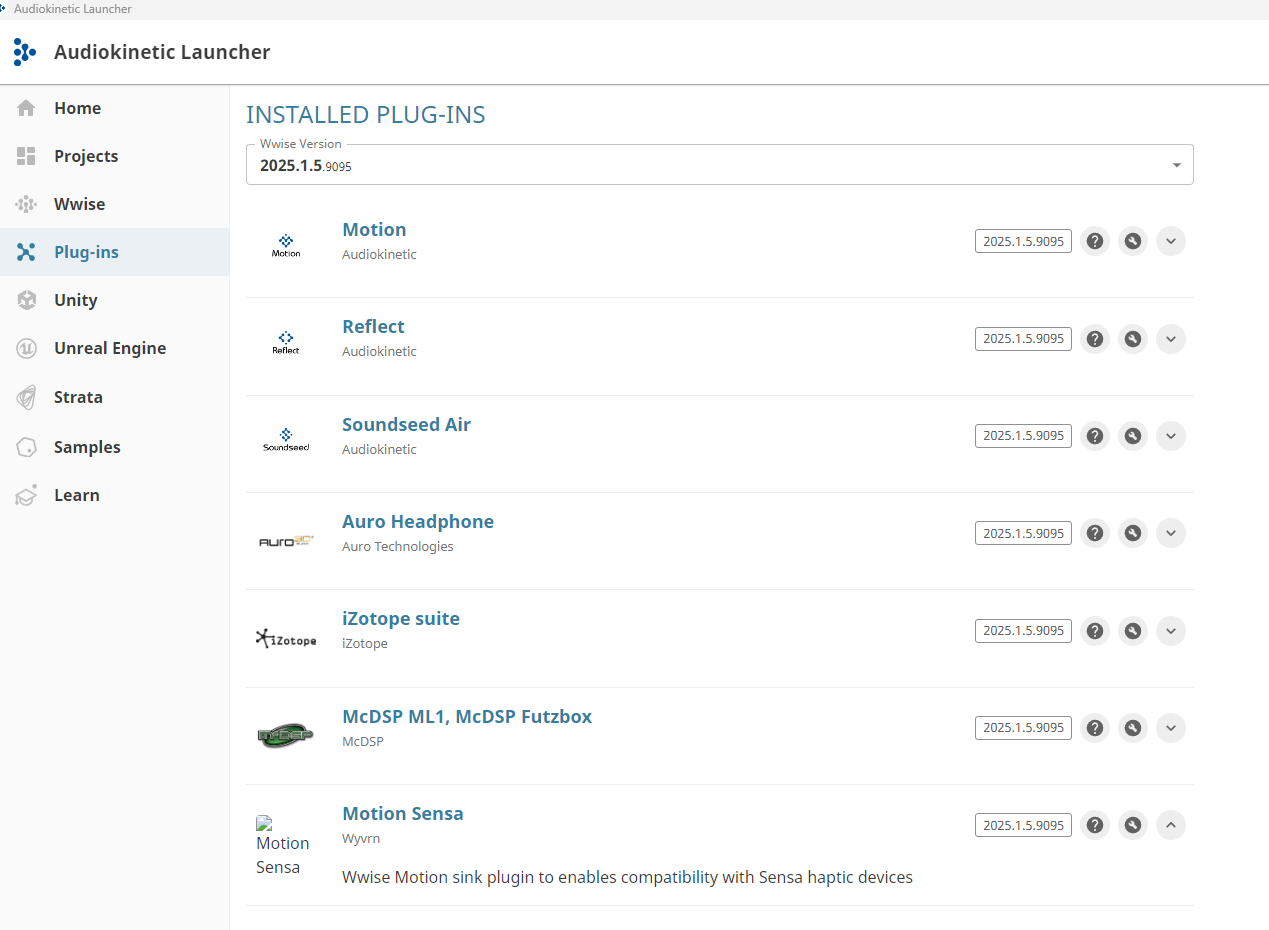
Installed Plugins list including Motion and Motion Sensa
Note: HD Haptics support requires Wwise 2025.1.6+. Earlier 2025.1.x builds (e.g. 2025.1.5) only expose Rumble functionality.
Usage
Project Setup
-
Create a new Wwise project. Keep Motion Presets and Razer Sensa enabled under Import factory assets.
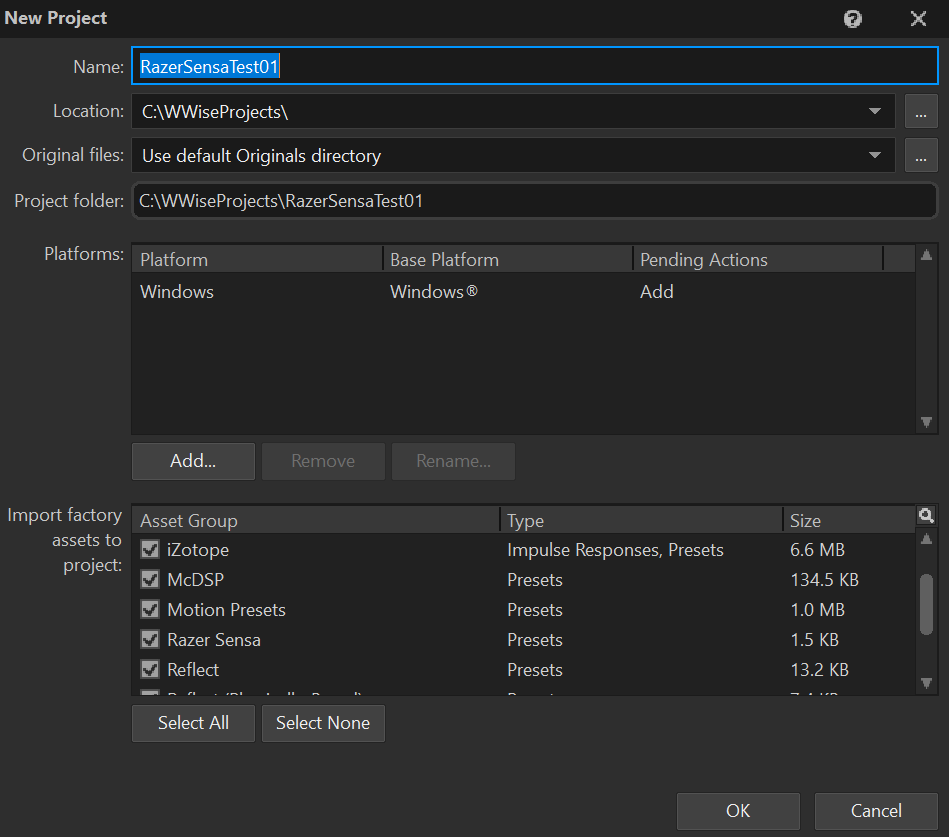
New Project dialog with Razer Sensa factory assets enabled -
On first use Wwise displays the LICENSE AGREEMENT for Motion plugin notice. Read it and click OK to continue.
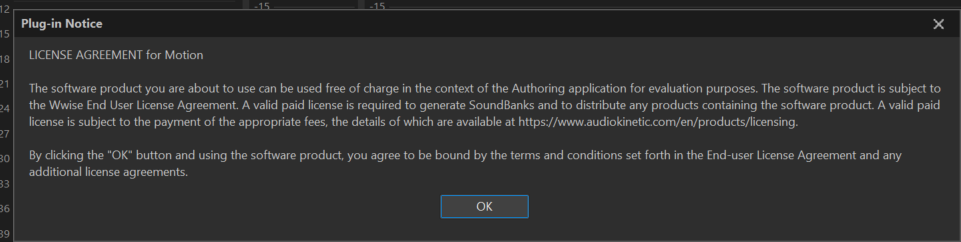
plugin Notice: LICENSE AGREEMENT for Motion Note: Free use is permitted in the Authoring application for evaluation. A valid paid license is required to generate SoundBanks or distribute products containing the plugin. See Audiokinetic licensing.
Motion Device
The Razer Sensa HD Haptics plugin surfaces as an Audio Device under Devices → Factory Motion.
-
In Project Explorer → Audio → Devices, expand Default Work Unit → Factory Motion. Right-click Factory Motion → New Child → Razer Sensa. This creates a
Razer_Sensadevice entry alongside the defaultDefault_Motion_Device.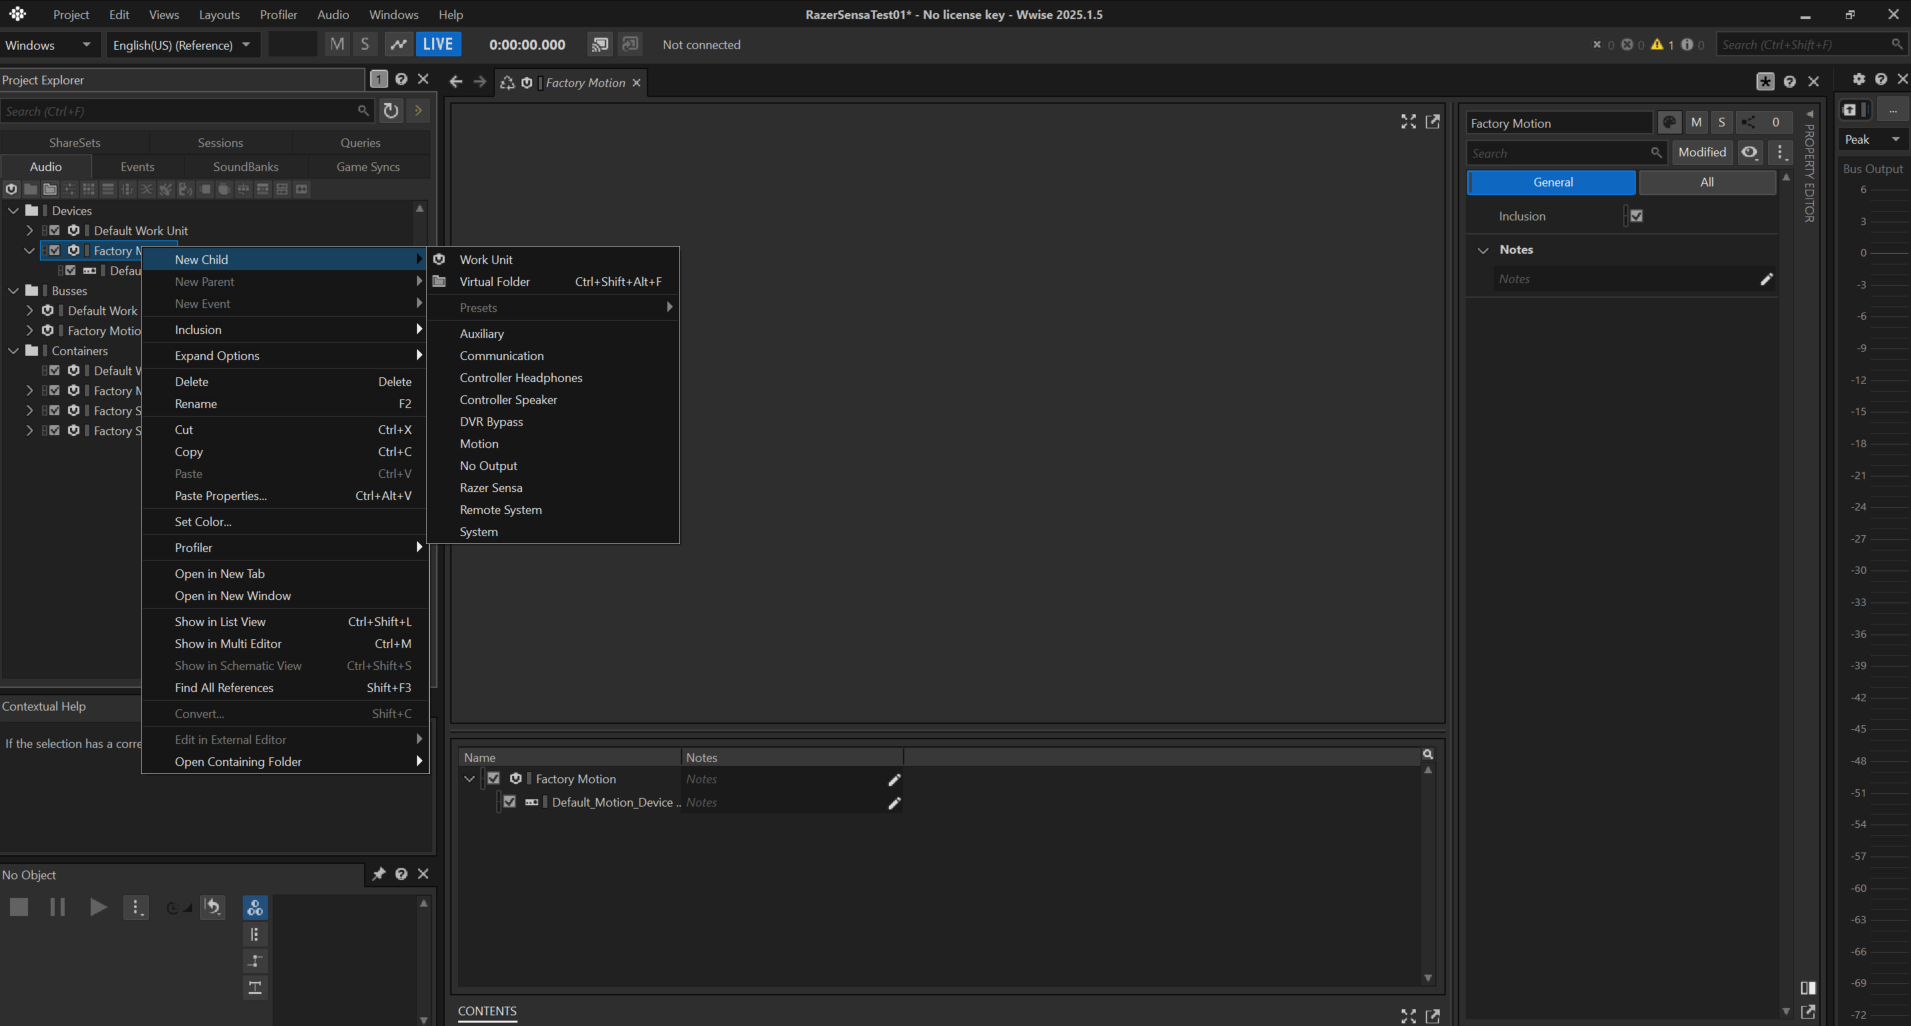
Factory Motion → New Child → Razer Sensa -
Select your Motion Factory Bus (under Buses → Factory Motion → Motion Factory Bus). In the Property Editor, open the Audio Device browser and choose Devices → Factory Motion → Razer Sensa. Confirm with OK.
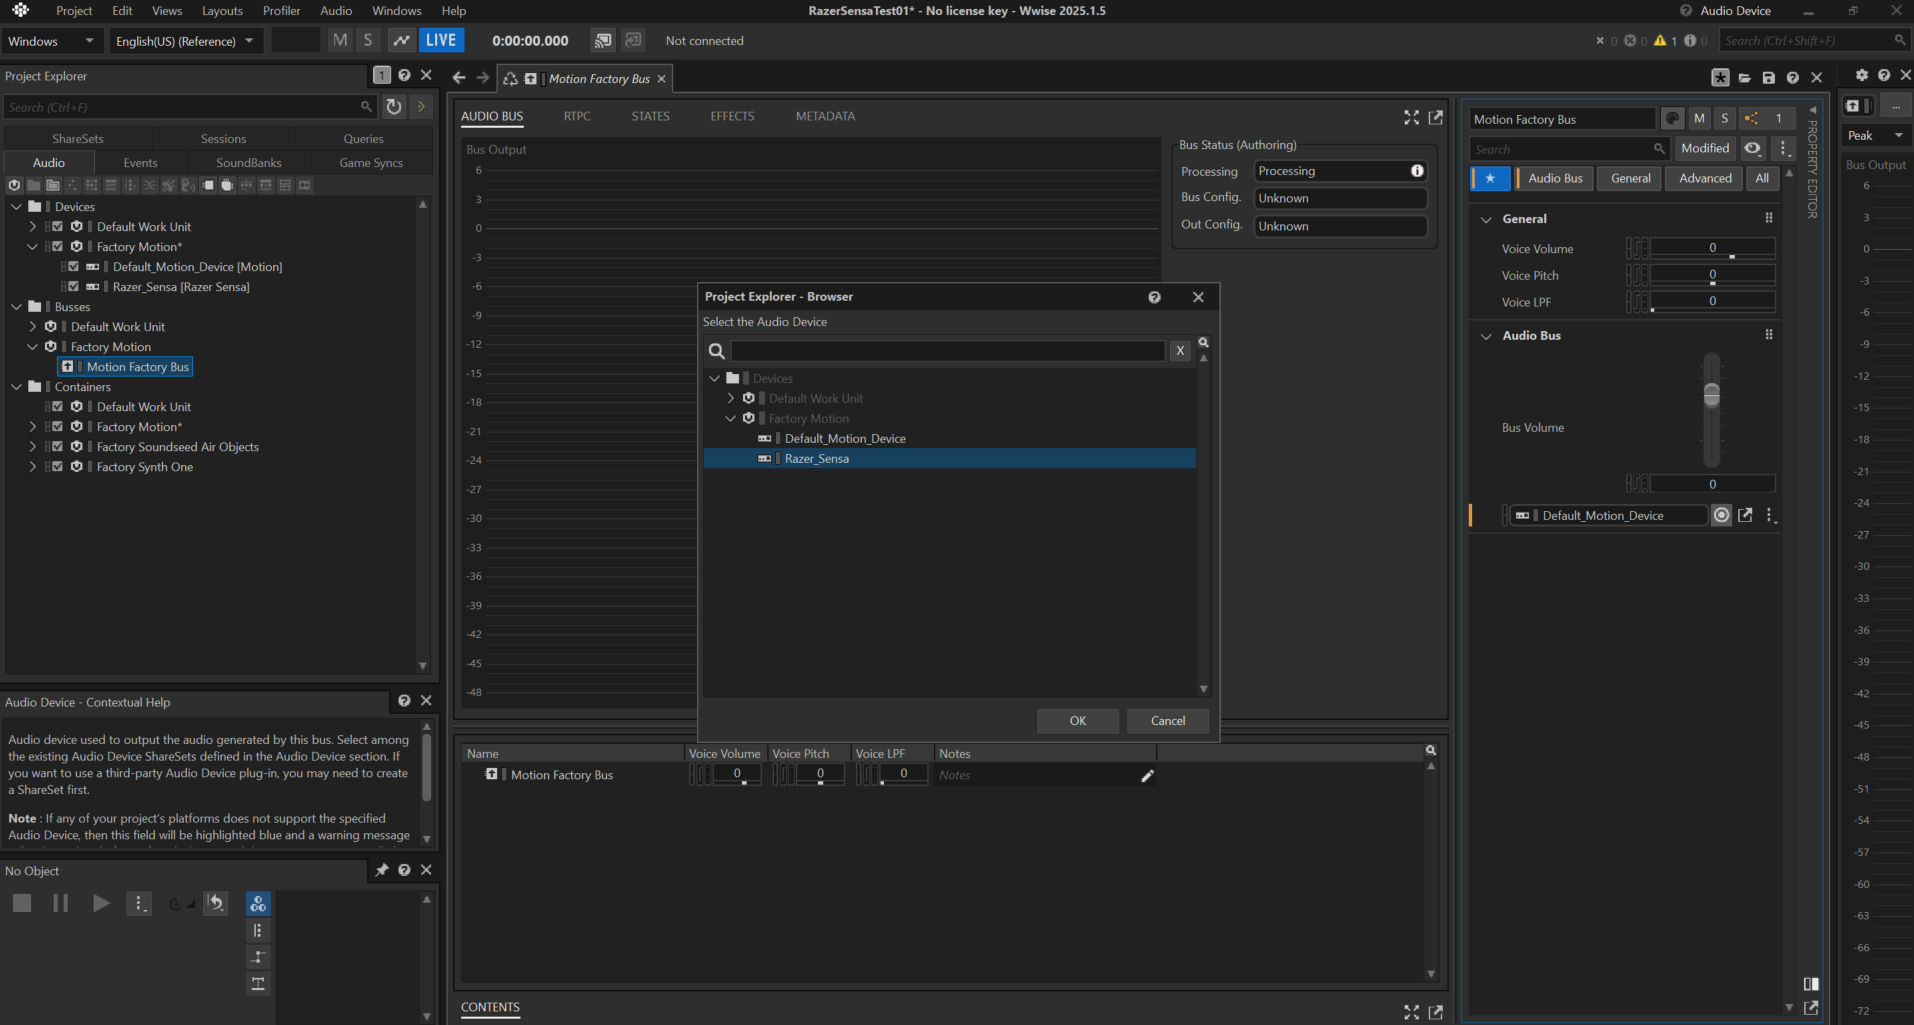
Audio Device browser — selecting the Razer_Sensa device
Note: The Motion Factory Bus is the only bus path that delivers full HD haptics — route everything you want to feel as HD through it.
Authoring
-
Open any container you want to use (e.g.
Sweep → Sweep Up → Long Sweep Up). -
In the Sound SFX editor, go to Sources and set Actuator Configuration to Generic Haptics 2-Channel.
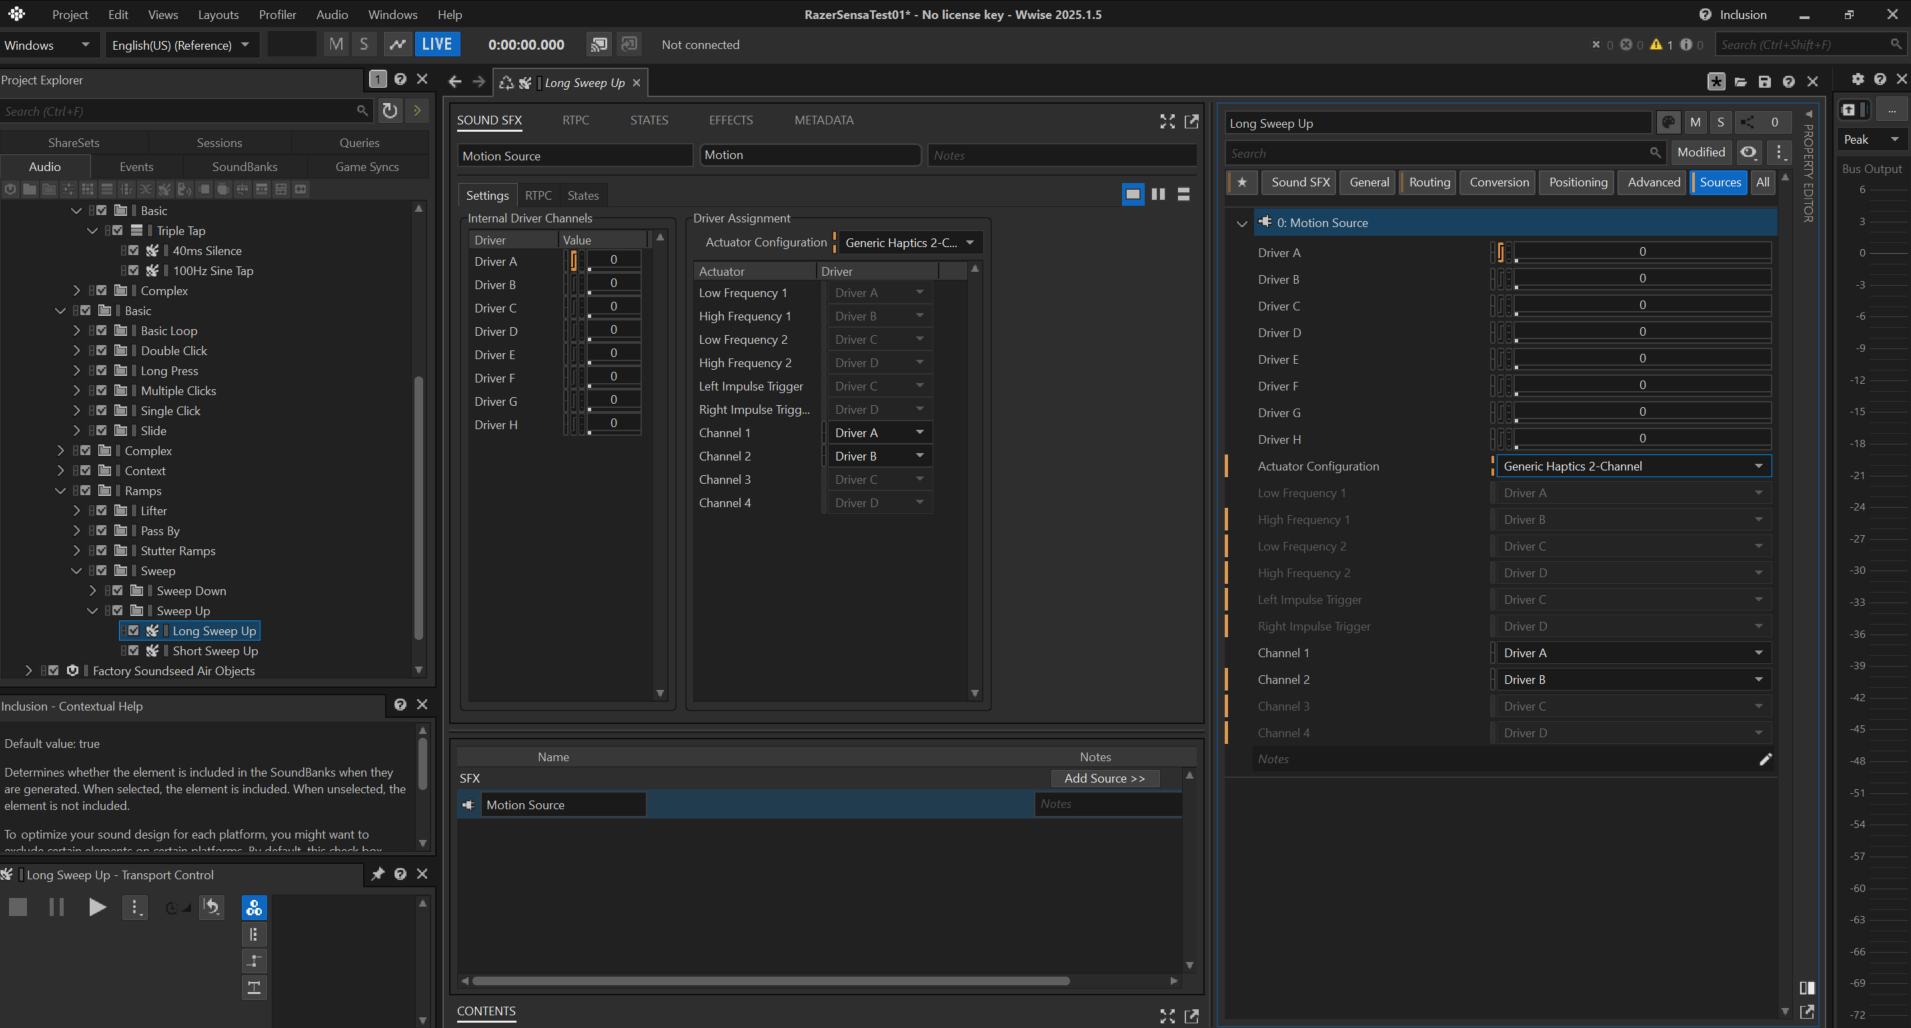
Sources tab with Generic Haptics 2-Channel actuator configuration Note: Use Generic Haptics 2-Channel — not "Generic 2-Channel". The two are different actuator configs and the latter will not drive Razer Sensa HD Haptics correctly.
-
Verify driver routing in the Sources panel:
- Channel 1 → Driver A
- Channel 2 → Driver B
- Additional drivers C–H are available for richer configurations.
-
Use the RTPC tab on the source to animate driver levels over time. Add an RTPC with Y Axis = Driver A (or B, etc.) and X Axis = Modulator Time (Custom). Sketch the envelope on the graph — step changes work well for oscillating sweeps; smooth curves work well for ramps.
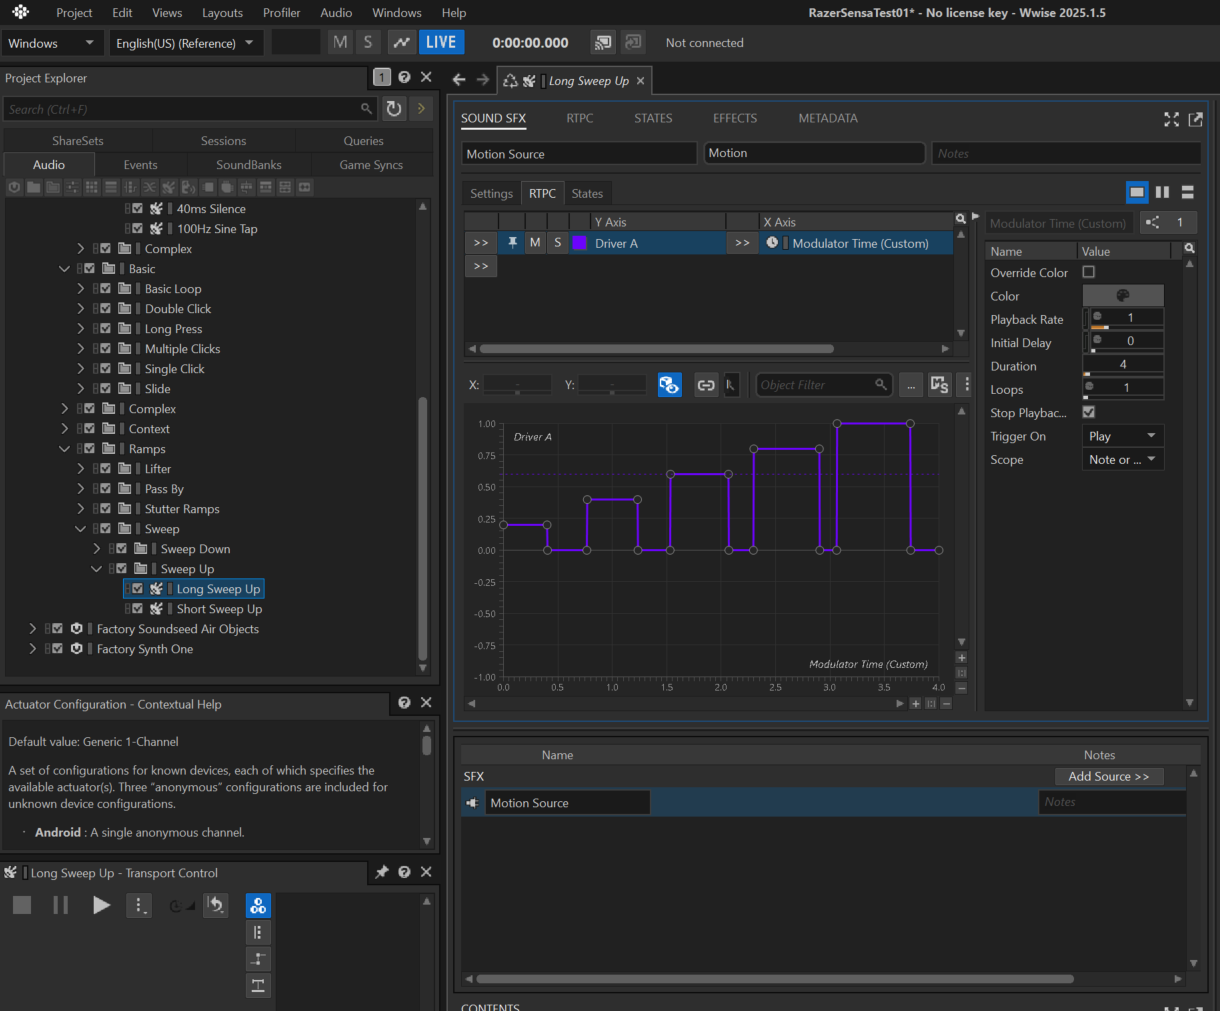
RTPC — Driver A over Modulator Time (Custom)
Parameters
Razer Sensa HD Haptics exposes its parameters through the standard Wwise Sound SFX Sources tab and the RTPC modulator.
Actuator Configuration
Selects the actuator layout used by the source. For Razer Sensa, always use Generic Haptics 2-Channel.
- Generic Haptics 2-Channel: Two-driver haptic configuration compatible with Sensa devices. Channels 1–2 map to Drivers A–B by default; additional drivers (C–H) are exposed for extended layouts.
- Generic 2-Channel: Standard stereo configuration — not intended for Sensa playback.
Driver Assignment
Maps source channels to logical drivers (A–H).
- Driver A / Driver B: Primary haptic drivers. Default routing is Channel 1 → Driver A, Channel 2 → Driver B.
- Driver C – Driver H: Extra drivers exposed for richer haptic configurations or future device support.
- Low Frequency 1 / High Frequency 1 / Low Frequency 2 / High Frequency 2: Frequency-band assignments used by certain Generic Haptics configurations.
- Left / Right Impulse Trigger: Trigger drivers for impulse-style haptic events.
- Channel 1 – Channel 4: Per-channel driver overrides on the Sound SFX Source.
RTPC Modulator
Properties on the right-hand pane of the RTPC tab, used to drive Driver values over time.
- Override Color: Enables a custom color for the curve in the graph.
- Color: Curve color (when override is enabled).
- Playback Rate: Time-scale multiplier for the modulator (1.0 = real-time).
- Initial Delay: Delay in seconds before the modulator starts.
- Duration: Total length of the modulator curve in seconds.
- Loops: Number of loop iterations (1 = play once; 0 = infinite).
- Stop Playback: When enabled, stops the playing sound at the end of the modulator duration.
- Trigger On: Event that starts the modulator (e.g. Play, Note On / Off).
- Scope: Scope of the modulator instance (e.g. Note or Event, Game Object).
Sources
The Razer Sensa HD Haptics device can be fed two ways: with authored .haptic clips through the Haptic Clip Player source, or with a regular .wav file driving the actuators directly.
Haptic Clip Player (.haptic files from Meta Haptics Studio)
For full HD haptic playback, use Meta's authoring tool to design a .haptic clip and then load it in Wwise through the Haptic Clip Player source plugin.
-
Author your clip in Meta Haptics Studio. Sketch the amplitude (and optionally frequency) envelope over time, and optionally analyze an audio file as a reference. Export to a
.hapticfile.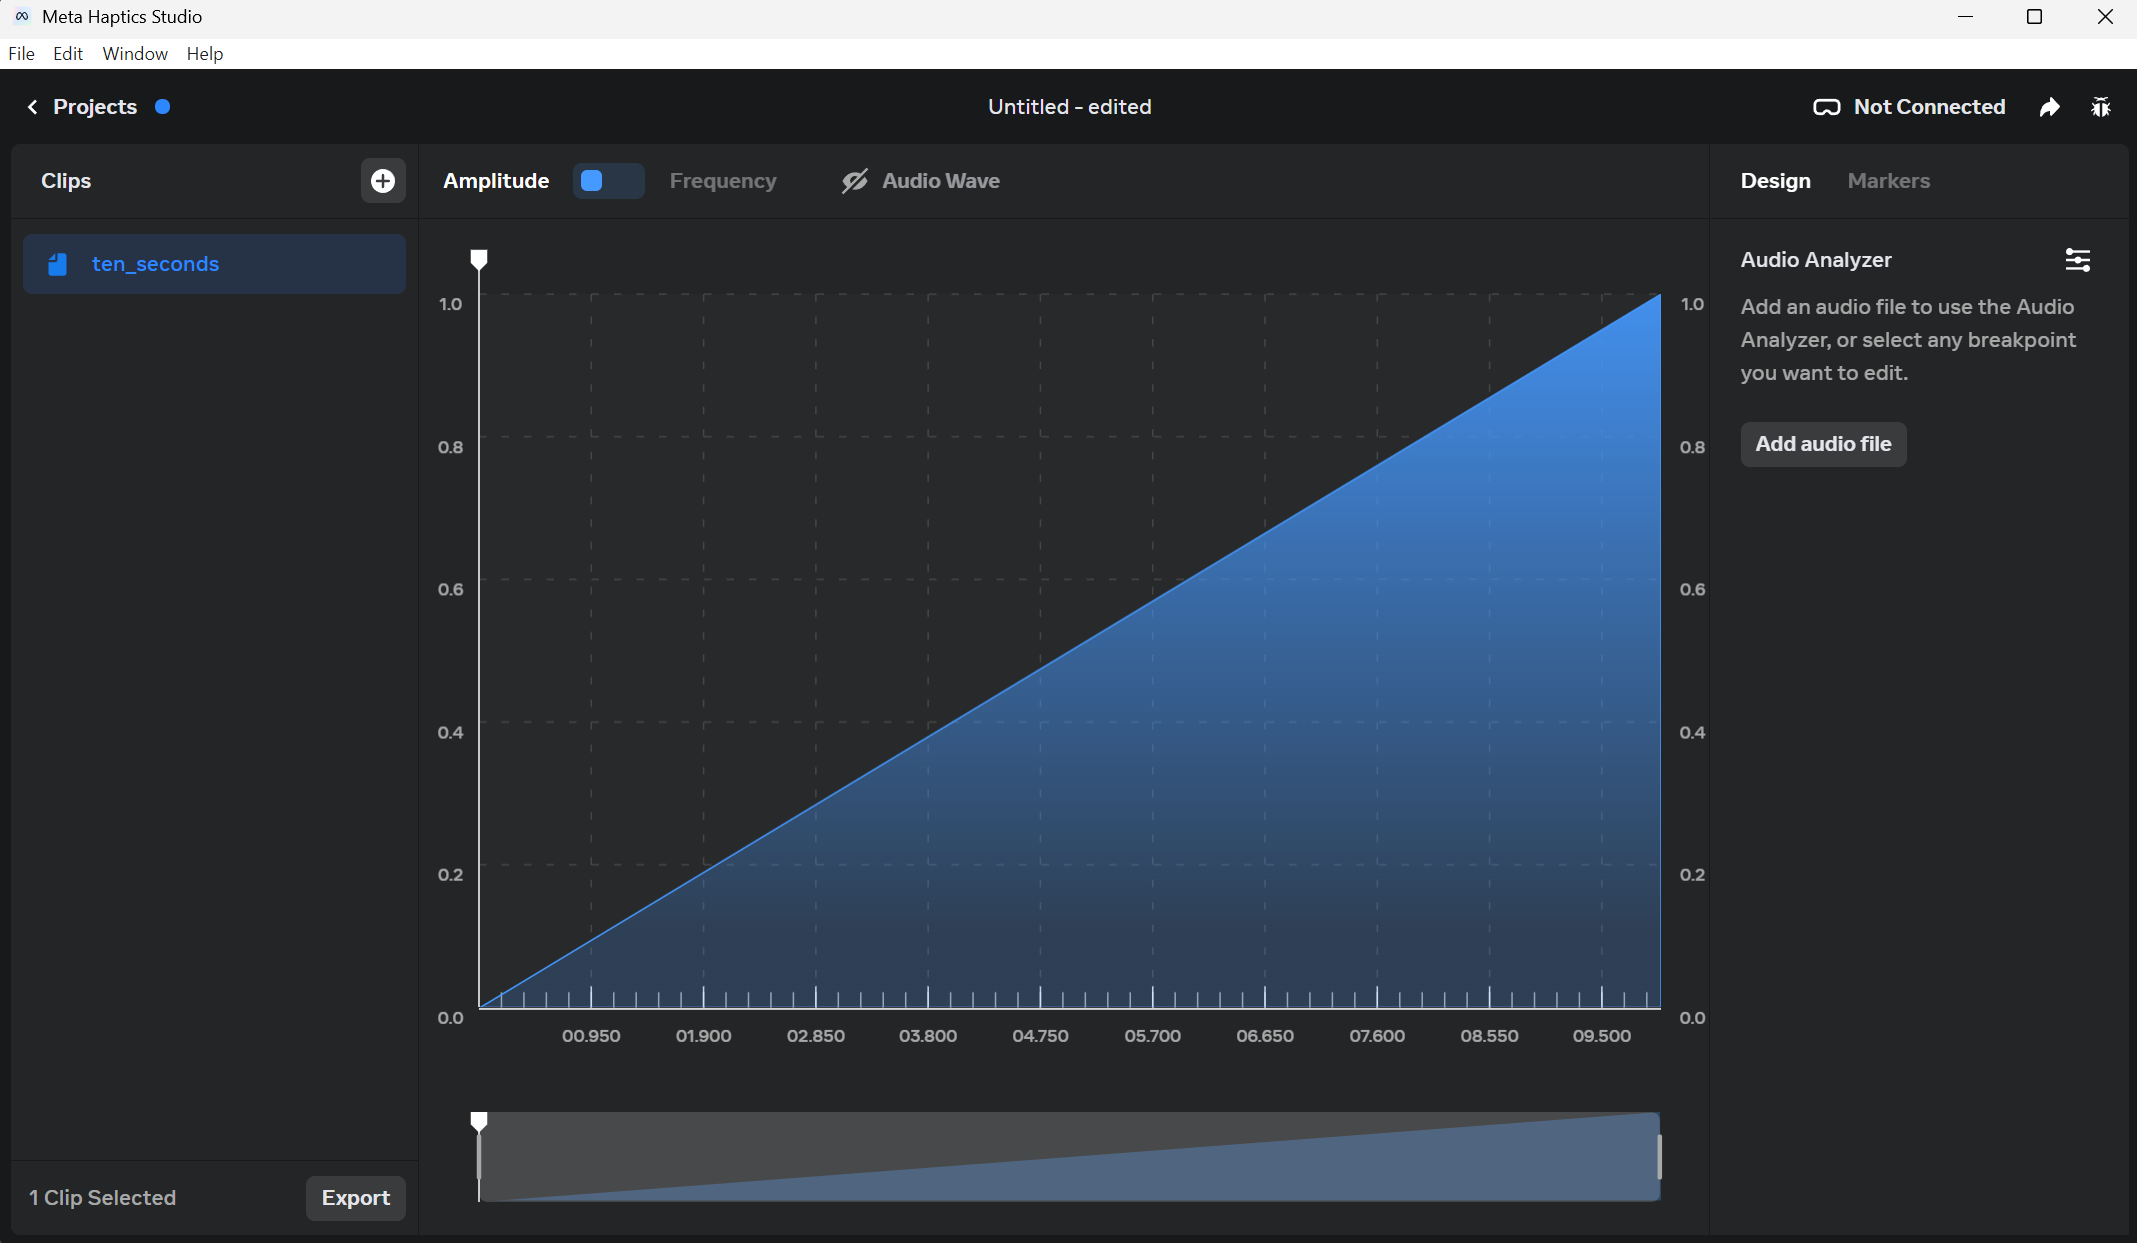
Meta Haptics Studio — authoring a .haptic clip -
In Wwise, under your container (e.g. an Actor-Mixer or Random Container), right-click and choose New Child → Source Plug-ins → Haptic Clip Player.
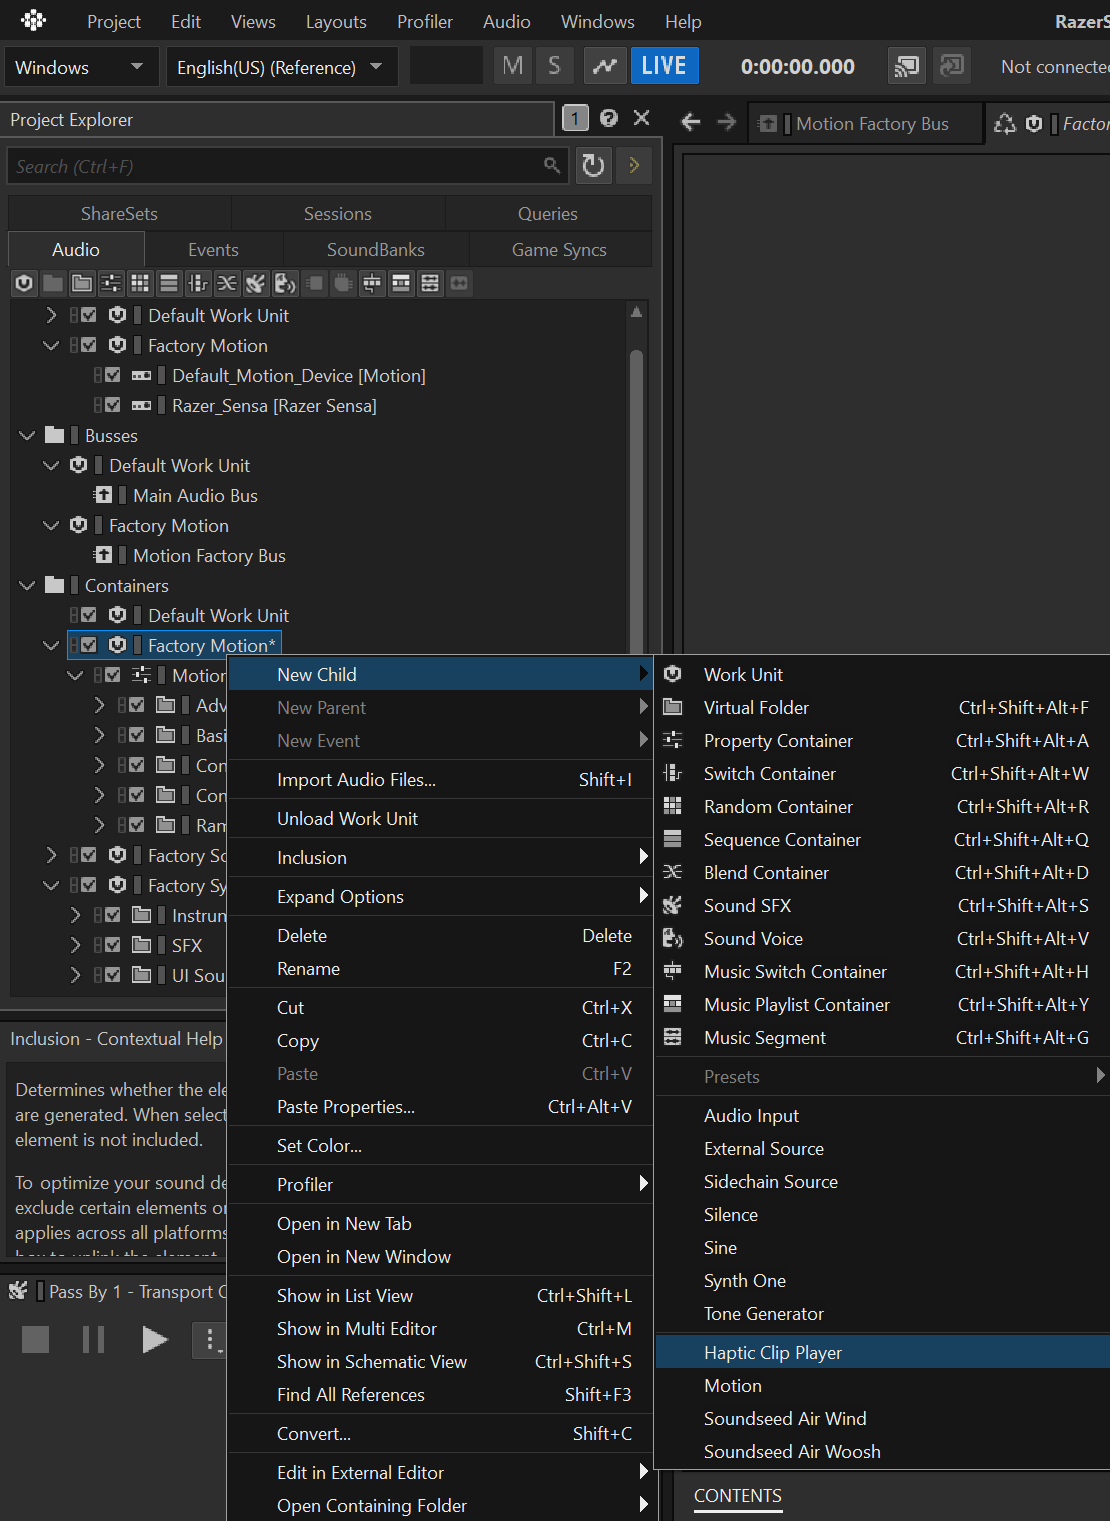
New Child → Source Plug-ins → Haptic Clip Player -
On first use Wwise displays the LICENSE AGREEMENT for Haptic Clip Player notice. Read it and click OK to continue.
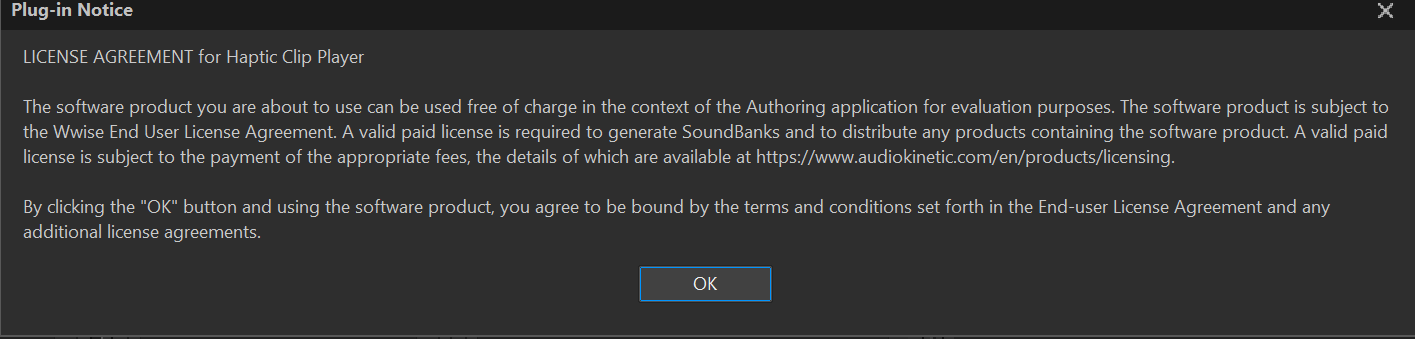
plugin Notice: LICENSE AGREEMENT for Haptic Clip Player -
In the Property Editor for the new source, point the Clip File field at the
.hapticyou exported from Meta Haptics Studio. -
Route the parent container's output to the Motion Factory Bus, with its Audio Device set to Razer_Sensa (see Motion Device).
-
Play the event. The
.hapticclip is rendered directly by the Razer haptic engine — no audio-to-haptic transcoding is performed, so the tactile output matches exactly what you authored in Meta Haptics Studio.
Note: Both the Haptic Clip Player source plugin and the Razer Sensa sink must be installed for the matching Wwise version. The Haptic Clip Player is part of the Motion plugin family.
WAV file fallback
If you don't yet have a .haptic clip — or want to reuse an existing sound asset as a tactile signal — you can drive Sensa straight from a regular .wav.
- Create a new Sound SFX under your container and import the
.wavas its Audio Source (the same way you would for any normal sound). - Open the Sound SFX's Sources tab and set Actuator Configuration to Generic Haptics 2-Channel (see Authoring). Map Channel 1 → Driver A and Channel 2 → Driver B for stereo content; for a mono WAV, both channels feed Driver A.
- Route the parent container's output to the Motion Factory Bus, with its Audio Device set to Razer_Sensa.
- (Optional) Use an RTPC on Driver A/B to shape the WAV's amplitude over time or against a game parameter.
When played, the WAV's audio signal drives the haptic actuators directly — the amplitude envelope and low-frequency content of the file become the tactile sensation.
Tips for working with .wav on the Motion Factory Bus
- Mind the channel configuration. In the Sound SFX Sources tab, the Channel Configuration Override decides how source channels reach the drivers.
Detect [2.0 (L,R)]maps L → Driver A and R → Driver B. A mono WAV maps to Driver A only — set the override explicitly if Detect isn't giving you what you want. - Calibrate with Make-Up Gain, not volume. Use the source's Make-Up Gain (−24 to +24 dB) to set haptic intensity. Audio-mixed levels almost never feel correct on actuators — calibrate by feel, on real hardware, rather than by ear.
- Favor low-frequency content. Sub-200 Hz energy translates best to actuator motion. Consider adding a low-pass filter (≈200–500 Hz) as an Effect on the Motion Factory Bus to strip jittery high frequencies that confuse the actuator.
- Pre-process for headroom. Compress or shape the signal so transients don't clip the actuator. Hot WAVs that sound punchy can feel buzzy or saturated on a Sensa device.
- Use Trim Start / Trim End to remove silence or pre-roll noise — every millisecond of dead air wastes actuator travel.
- Loop cleanly. For continuous haptics (engine drone, hum, rumble bed), check Override WAV Loop Points, set Loop Start/End on a zero-crossing chunk, and set a non-zero Crossfade Duration with a Sine Crossfade Shape to avoid felt clicks at the loop seam.
- Smooth attacks and releases. Even a short Fade-in Duration (Sine) and Fade-out Duration (Reciprocal Sine) avoids harsh actuator thumps at start/stop.
- Override Conversion Settings for haptics. Haptic playback only needs the amplitude envelope. PCM or a light Vorbis preset is plenty — bigger codecs just inflate SoundBanks without making the haptic feel better.
- Drive amplitude with an RTPC. For dynamic content (e.g. engine RPM, charge level), keep the WAV tonal and modulate Driver A / Driver B from a game parameter rather than authoring multiple variants.
- Stereo imaging doesn't translate. Wide stereo panning or M/S tricks have no tactile meaning. Mix for clear L/R energy on each driver, or downmix to mono and feed Driver A.
- Test on hardware early. Actuator response varies by device — what feels great on one Sensa target may be too weak or too aggressive on another. Lock values against real hardware, not the authoring profiler.
- "Generic Haptics 2-Channel" is the only actuator config that carries a true audio signal. Every other Generic option (Generic 2-Channel, Generic 4-Channel, etc.) is a rumble-envelope emulation — it transmits an envelope curve, not the audio stream itself. In earlier Wwise releases this entry was named DualSense, which made the distinction clearer. If your WAV is silent or feels "flat" on the device, double-check that you're on Generic Haptics 2-Channel and not one of the envelope-only configurations.
- Override the audio device at the preferences level for quick A/B testing. Open Audio → Authoring Preferences and override the Audio Device for the Motion Factory Bus to Razer_Sensa. This lets you test a borrowed project that's still wired to
Default_Motion_Deviceagainst a Sensa target without modifying the project itself — handy when iterating with collaborators. - Rumble emulation is intentionally generic. When Wwise plays a WAV through the Sensa sink, the runtime can't tell whether the source was authored as HD haptic content or as rumble — so it applies one shared rumble model rather than per-device fine-tuning. For DualSense-style fallback it generates square waves into the low-frequency actuator and lets the engine infer transients. It works, but it's the rough path; for HD fidelity always prefer the Haptic Clip Player with
.hapticfiles (see above). - The plugin targets all compatible Sensa devices at once. You don't pick a specific device at author-time. The runtime fans the haptic signal out to every connected Razer Sensa-compatible target, synchronized through the Wwise mixer — so the same project will drive a Kraken headset, a controller, and other Sensa peripherals simultaneously.
- Engine integration is automatic. Once the project is wired source → Motion Factory Bus → Razer Sensa sink, exporting to Unity or Unreal "just works" through Audiokinetic's standard Wwise integration. No engine-side glue code is required — generate SoundBanks the way you would for any other Wwise plugin and the haptics route through on their own.
Note: WAV playback is the Rumble-style path. For authored HD haptics use the Haptic Clip Player with
.hapticfiles instead.